一、学习素材: Slicercn001
二、学习目标:熟悉模块Crop Volume的基本用法

-
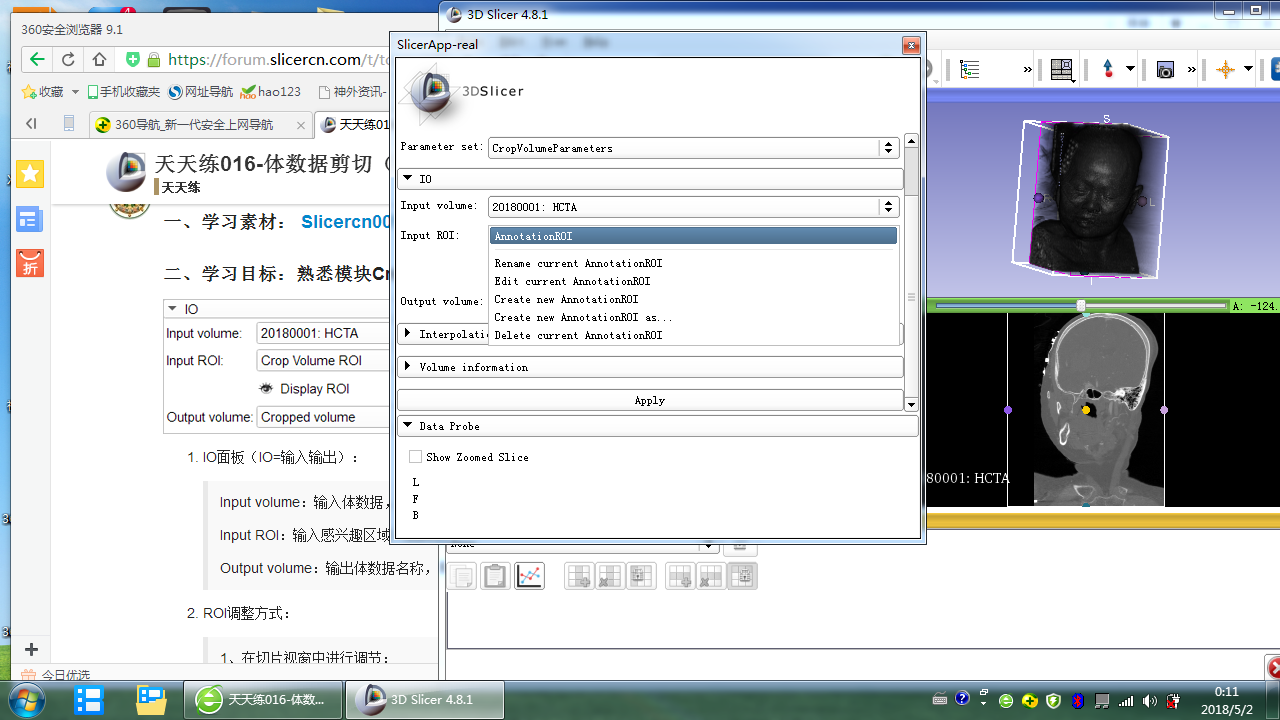
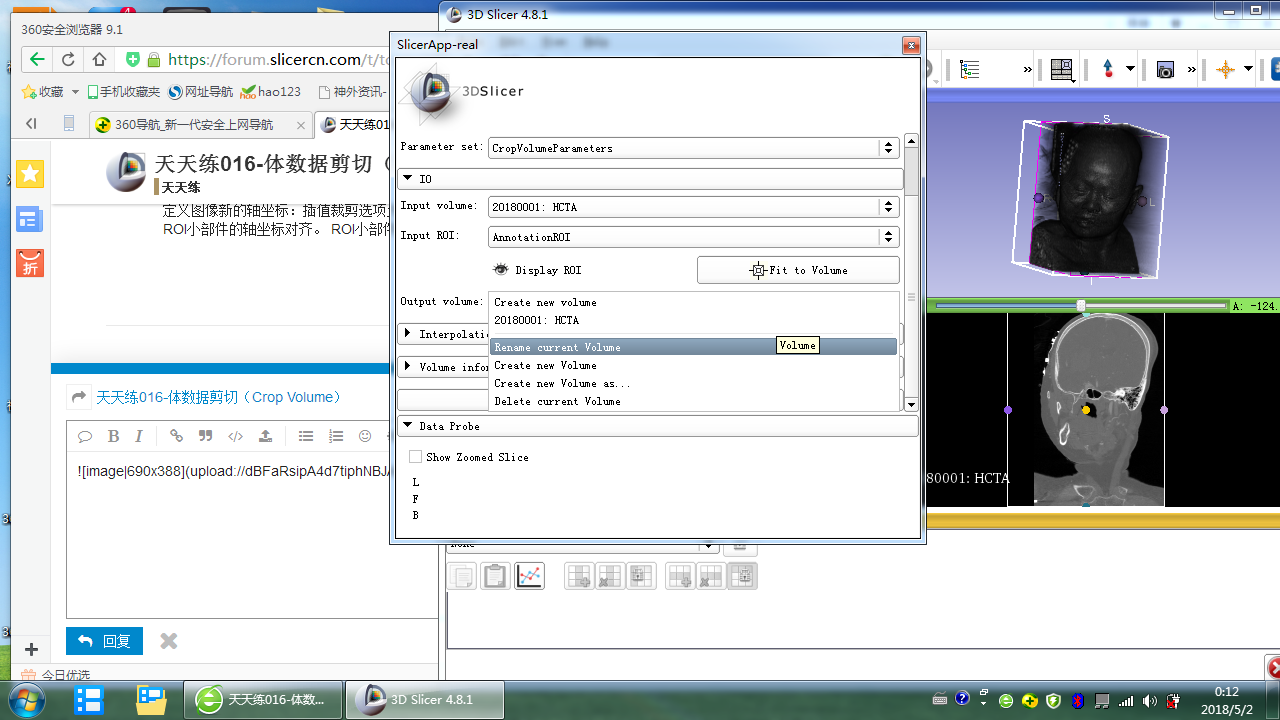
IO面板(IO=输入输出):
Input volume:输入体数据,要剪裁的原始数据。
Input ROI:输入感兴趣区域(裁剪框),可以选用已存在的或者新建。
Output volume:输出体数据名称,剪切之后的体数据名称,不填可以自动生成。
-
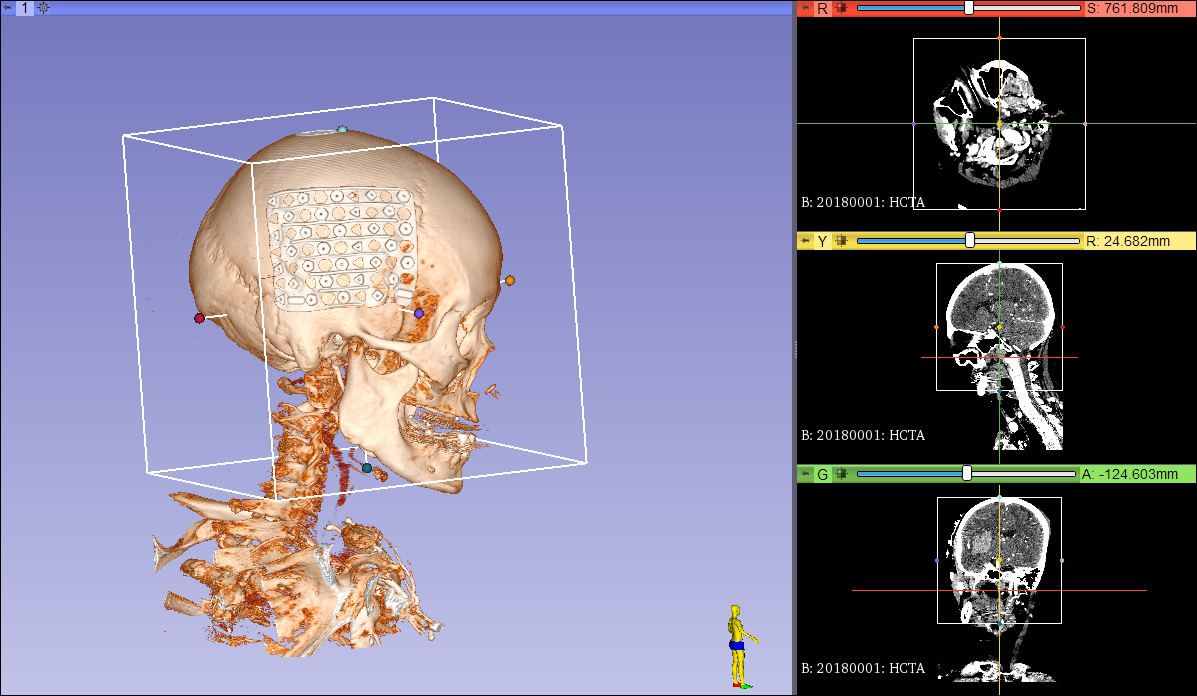
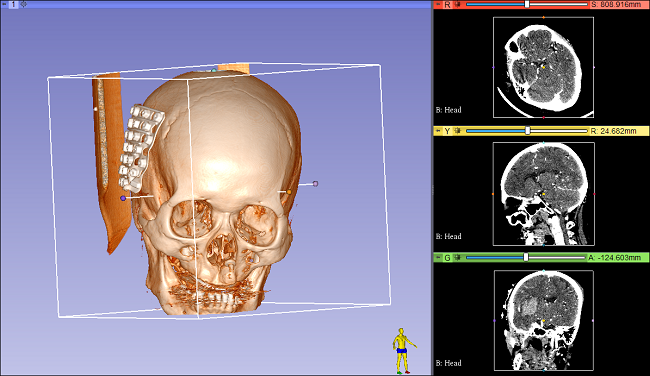
ROI调整方式:
1、在切片视窗中进行调节:
- 通过用鼠标拖动彩色球与ROI进行交互。
2、在三维视窗中进行调节:
-
通过用鼠标拖动彩色球与ROI进行交互。
-
通过在Volume Rendering模块中调节滑块更改ROI的位置和大小。
三、思考题:
-
体数据剪切常应用于哪些情况?
参考答案
1、 You are trying to segment an object that occupies small portion of the image . Cropping the ROI with that object can simplify your segmentation task and reduce both the memory requirements and processing time.
2、You are trying to segment an image that has very different resolution along different axes (for example, 0.2mm with in an image slice, 1.0mm between slices). Isotropic spacing option ensures that the output volume has equal spacing on all axes. Doing this as part of cropping is useful, because forcing the same (high) resolution in all axes would increase the total number of voxels (and therefore memory need, processing times, etc.), but removing irrelevant parts of the volume can compensate for this increase in size.
3、You are trying to register two objects that occupy smaller portions of the image . In this scenario, cropping will allow you to focus the processing at the region of interest, and simplify registration initialization.
4、 Define new axis directions for your image: Interpolated cropping option allows the output volume to have different axis directions that the original volume. The output volume’s axis directions will be aligned with the ROI widget’s axes. ROI widget axes can be rotated using Transforms module.
-
应用剪切体数据模块完成如下操作,完成者跟帖(不必贴图占用网站空间)。
Crop Volume模块使用的详细步骤请参照微信公众号文章: 3DSlicer教程之去除背板(一)
更多教程及内容请关注微信公众号3DSlicer社区(SlicerCN):